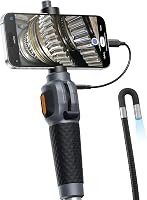
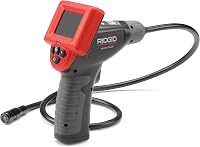
How to Install an Endoscope Camera on a PC
To install an endoscope camera on a PC, connect a PC-compatible USB camera, install its software if required, and select it as the camera source. Many phone-only borescopes do not work with Windows PCs, so check the connection type before setup.
On this page (8 sections)
- Is your endoscope camera compatible with a PC?
- What should you do before plugging in the camera?
- How to install an endoscope camera on a PC step by step
- Which products help with endoscope inspections?
- How do you fix a PC that does not detect the camera?
- How can you get a clearer inspection image?
- How should you save and review endoscope footage?
- What is the best way to install an endoscope camera on a PC?
To install an endoscope camera on a PC, connect a computer-compatible USB inspection camera, open a camera or video app, and select the endoscope as the camera source. The camera must support the computer's operating system and connection type, because many phone borescopes work only through a mobile app.
Start by identifying the connector. USB Type-C cameras are common, but a Type-C plug alone does not prove Windows or macOS support.
Check the camera's compatibility information before troubleshooting a phone-only model.
Is your endoscope camera compatible with a PC?
The camera needs computer support, not just a USB connector. A phone camera with a Type-C plug may still require a brand app that runs only on a smartphone.
Check these details:
- The computer's operating system.
- The camera's connector and USB standard.
- Whether it works with a PC app or standard camera software.
- Whether it needs a separate driver.
The Teslong 10FT USB C Endoscope Camera is designed for USB-C phones and tablets, including iPhone 15, iPhone 16, iPhone 17, USB-C iPads, and Android devices with OTG support. Its compatibility information excludes Windows PCs and MacBooks, so it is not suitable for computer installation.
The DEPSTECH 2K Endoscope Camera with Light connects to phones and tablets through USB Type-C or Lightning and works through the DEPSTECHCAM App. Its listed support covers Android, smartphones, tablets, iPads, and iPhones rather than PCs.
The Klein Tools ET16 Borescope connects through USB Type-C and uses the Klein Tools ET16 Borescope App on Android devices. It is intended for Android phones and devices with OTG support, not a general Windows webcam setup.
If you need computer-based inspection, choose a camera that clearly supports the computer. For phone viewing, compare a Wi-Fi borescope vs inspection camera before buying an adapter.
What should you do before plugging in the camera?
Prepare the computer, cable, software, and inspection area before connecting the camera. This prevents a loose cable or blocked permission from looking like a camera failure.
Close video apps that could already be using the computer's camera. A meeting app, browser tab, or recording program can hold the camera source and stop another program from opening it.
Clean dust from the computer's USB port and inspect the camera plug for damage. Use a direct port first, rather than a hub or extension, so there are fewer connection points to troubleshoot.
If the camera has adjustable lights, prepare to turn them on after the live image appears. A working camera can still show a dark screen when the probe lights are off or too low.
Set up a folder for inspection files before recording. Use a name such as kitchen-drain-2026-10-20, then save images and videos there as you work.
For a wider job such as checking joists, ducts, or wiring, an inspection camera for crawl space may fit better than a short handheld probe. Match the cable length and viewing method to the area you need to reach.
How to install an endoscope camera on a PC step by step
Connect the camera directly, open compatible software, and select the endoscope from the camera list. Menu names vary by operating system and app.
Step 1: Connect the USB camera
Plug the endoscope into a compatible USB port. If it uses USB Type-C, insert the connector fully without forcing or twisting the cable.
Wait for the computer to recognize the device. Some cameras receive power through USB and turn on their probe lights immediately, while others need a button or app command.
Step 2: Open a camera or recording app
Open the computer's camera application or compatible video software. If the built-in webcam appears, open the camera-source menu and select the external USB camera.
If the software asks for camera permission, allow access. Close and reopen the app if the camera does not appear immediately.
Step 3: Adjust the live image
Turn on the endoscope's lights and raise the brightness gradually. Too much light can wash out a close object, while too little can hide cracks, debris, or fittings.
Keep the probe near the target without pressing the lens against it. Move slowly until the detail looks sharp.
Step 4: Capture and save evidence
Use the app's photo or video button to record the inspection. Save the first clear image before moving the probe so you have a reference point.
Label files as you go. A name such as pipe-joint-01.jpg is easier to use later than automatic camera numbers.
Which products help with endoscope inspections?
These products solve different inspection needs, but they are not interchangeable for PC installation. Their connection and app support determine where you can use them.
DEPSTECH 2K Endoscope Camera with Light
The DEPSTECH 2K Endoscope Camera with Light uses a 2560 × 1440P camera, a 16.5 ft semi-rigid cable, dual front and side lenses, and adjustable LED lighting. It works through the DEPSTECHCAM App on compatible phones and tablets.
Its 7.9 mm scope reaches narrow channels, while the front and side cameras provide different viewing angles. The IP67 rating suits damp or underwater use, and the included hook and magnet help retrieve small objects.
Choose this model for phone-based inspections requiring a longer cable, dual views, and higher image resolution. It is not suitable for direct PC installation because its stated support centers on phones and tablets.
For a camera with built-in illumination, see the guide to the endoscope camera with light.
Teslong 10FT USB C Endoscope Camera
The Teslong 10FT USB C Endoscope Camera has a 10 ft semi-rigid cable, 8 high-brightness LED lights, fixed focus, and an IP67 waterproof rating. It connects to USB-C phones and tablets and uses an app for viewing.
Its 1.0MP camera records MP4 video, and the package includes a hook, magnet, and side-view mirror. The side-view accessory helps inspect surfaces that do not face the probe directly.
Choose Teslong for a USB-C phone inspection where stable wired viewing matters. Do not choose it for a Windows PC or MacBook installation because its stated compatibility excludes those computers.
Klein Tools ET16 Borescope
The Klein Tools ET16 Borescope uses an 8 mm camera on a 10 ft armored gooseneck cable. It has 6 adjustable white LEDs, an IP67 waterproof camera, and a USB Type-C connection powered by the connected device.
Its camera produces 640 × 480 images and works through the Klein Tools ET16 Borescope App on compatible Android devices. The package includes a hook attachment, carrying case, and instructions.
Choose this model for Android inspections that benefit from an armored cable and direct device power. It is not a general PC camera, so connect it to a supported Android device.
How do you fix a PC that does not detect the camera?
Start with the connection, then check the camera source and software permissions. Testing one change at a time makes the cause easier to identify.
Unplug the camera and reconnect it to a different direct USB port. If you used a hub, remove it for the first test.
Then close and reopen the camera app.
If the computer sees the device but the image stays blank, open the camera-source menu. Select the external USB camera instead of the built-in webcam, then turn on the probe lights.
If the camera still does not appear, the model may be designed for a phone app rather than a PC. The DEPSTECH, Teslong, and Klein Tools products above are phone-focused, even though some use USB Type-C connectors.
A Type-C connector only describes the connection family. It does not turn a phone-only camera into a computer webcam.
How can you get a clearer inspection image?
Move the probe slowly, control the LEDs, and keep the lens within its focus range. A stable image is more useful than a fast sweep through a pipe or cavity.
Start with moderate light. Increase it when the area is dark, then reduce it if a nearby metal or wet surface reflects too strongly.
Rotate the probe gradually instead of spinning it. With a dual-lens camera, switch between front and side views when a wall or bend blocks the main lens.
Keep the cable supported near the entry point. A semi-rigid cable gives control, but unsupported length can make the tip swing and blur the view.
Pause before each photo. Still images need a steady probe, and the pause lets the camera show the target clearly after a direction change.
How should you save and review endoscope footage?
Save original images and videos in a labeled folder, then review them on the computer after the inspection. This creates a simple record of where each finding appeared.
Use names such as crawl-space-joist-01 or drain-bend-02. Include the direction or location when it helps someone else understand the image.
Keep original files before cropping or adding notes. A marked-up copy can explain a crack or blockage, while the original preserves the full view.
Review footage at normal speed, then pause on important frames. Video shows how the camera reached a point, while still images are easier to share in a repair record.
For a longer sewer run, a dedicated sewer camera with locator may provide a better setup than a short phone endoscope.
What is the best way to install an endoscope camera on a PC?
Use a camera that explicitly supports the computer, connect it directly by USB, select it in compatible software, and save labeled files as you inspect. A phone-only endoscope cannot be installed on a PC simply because it has a USB Type-C plug.
For phone inspections, choose DEPSTECH for dual lenses, a 16.5 ft cable, and 2K image resolution. Pick Teslong for a 10 ft USB-C phone scope with 8 LEDs, or choose the Klein Tools ET16 for an Android-focused 10 ft armored cable.
The key rule for how to install an endoscope camera on PC is simple: match the camera's software and device support before connecting it. That prevents most compatibility problems and gives you a cleaner inspection record.
Frequently asked questions
Can I use an endoscope camera with a desktop computer?
Yes, if the camera supports the computer's USB connection and has compatible software or works as a standard camera source. A phone-only model that requires a mobile app will not automatically work with a desktop computer.
Do endoscope cameras need drivers on Windows?
Some USB inspection cameras work through Windows camera support without a separate driver, while others need brand software. Connect the camera, open the camera application, and check whether the device appears before installing additional software.
Why does my endoscope camera show a black screen?
A black screen usually comes from a wrong camera source, blocked permissions, poor USB contact, or insufficient lighting. Select the endoscope in the camera app, allow camera access, reconnect the cable, and turn on the probe lights.
Can I save endoscope camera images on a PC?
Yes, a compatible camera app can capture still images or video to the computer. Choose a clear folder before the inspection, then review the saved files after recording so you can label findings by room, pipe, or equipment.